Computers for Creating

Over time I have read some great articles about how we use computers in education. Today I found yet another where some of the words resonated greatly with my own thinking.

A screenshot of part of the article from http://bit.ly/1qwecfu

This article appeared on Mindshift in February 2012 and talks about the thinking behind creating a Scratch for Juniors to introduce young children to programming concepts. This one statement “We don’t want kids to see the computer as something where they just browse and click. We want them to see digital technologies as something they can use to express themselves.” is a thought that I have often voiced in discussions about computer use in classrooms.

Interestingly the new Scratch Jr app has just been launched two years later. It makes me wish I had an iPad! I am hoping there will be an Android app at some time in the future.

Screenshot of Scratch Jr. http://bit.ly/1nQVCAC

Have you had a chance to use Sratch Jr? What did you think? Leave a comment to share your thoughts.

Professional Development – my responsibility

Part of my role as an educator is to also be a learner. One way that I do this is make sure that I keep reading texts, articles, blog posts and tweets about education. This helps me to consider how I teach, the effectiveness of my teaching and to find other ways to approach the teaching tasks I have. Over the school holidays I have touched base with my favourite blogs through my RSS reader – Google Reader – and I have dipped into a few books now and then. Today I came across this little gem and found a few things to inspire me. That included this piece of advice about rules:

Never have more than three rules for your media
center.

These are mine:
™ Be doing something productive
™ Be doing it in a way that allows others to be productive
™ Be respectful of other people and their property.

from Machines are the easy part; people are the hard part: Observations about making technology work in schools: Second Edition by Doug Johnson

Great little reminder to keep things simple.

School is nearly back for me and I have enjoyed creating my on PD throughout the holidays. I will need to keep creating my own PD opportunities as I move through another teaching year. My first new step was to accept the opportunity to run a PD session for some senior secondary teachers. Not something that I would have considered without being approached. We had a fairly relaxed session exploring the Promethean software that goes with the Promethean Activboards. What did I gain from this?

  • An insight into how hard it can be to learn new software.
  • Confirmation of the range of approaches to technology use by teachers.
  • How PD does need to be very personalized for teachers to gain the most benefit.
  • To slow down with my explanations!
  • That technology hiccups are always there and that finding the solution is easy afterwards but then it is too late.
  • I like talking about and sharing technology ideas with others.
How do you organize your personal PD?

Using Animoto

One of the online sites I discovered during my recent participation in the Edublogs Teacher Challenge was Animoto. It has fast become one of my favourites – particularly when I can combine it with MS Powerpoint’s ability to save slides as JPEG images. One of the spelling activities we do each week is called Word Of The Week. We choose one word to focus on and make as many spelling based observations as we can about that word.

By creating a template in Powerpoint it is very easy to create a new set of images about our word each week, upload them to Animoto and create a movie showcasing all the ideas about our word of the week. I can then embed this into our class intranet pages for my class to refer to at any time over the rest of the year. Our collection will grow week by week.

Trialling Windows Live Writer

I have just downloaded Live Writer and this is my first try at adding a blog post via this program.

I have read about Live Writer and just decided to give it a try.

The ribbon interface gives it the same feel as all the other Microsoft Office products and the layout on the screen is nice and clear. I am not sure whether there is any advantage at the moment with using this and I just used the preview tab and got a very garbled preview that linked this post with a previous post so will now publish this short trial post and see the end result.

ArtRage – Using Layers To Create A Simple Animation

In my last ArtRage post I wrote about being able to create the parts of your drawing out on separate layers. Each part of your drawing sits on its own piece of paper and the stack of papers show the whole drawing.

We can use the view layer function in the layers to hide parts of the drawing. This function is found in the layers panel. The layers panel is usually found on the left side of your ArtRage page but can be moved around.

The flower has all its parts when all the layers are visible but it is possible to have only some parts visible by toggling the layer visibility with the eye.

This can be a useful feature for creating animated stories. You can design all the artwork within ArtRage on different layers and then use the visibility toggle to create all the exported images you need  to have a flower grow its petals one by one or an arm move up and down. You can build up a set of images that contain the parts you need for each animation by toggling the visibility of your layers in ArtRage. As you are always working in the one ArtRage drawing lining up the parts of your animation is easy.

Here is a quick sample movie with the flower growing one petal at a time.

There are special animating programs that can be used but I think that this is a good way to show students how complex animating can be. It is very similar to the old flip book that could be made from a stack of paper with a drawing in the corner that changed as you flipped through the pages.

How else might the layer visibility tool be useful for students in your classroom?

ArtRage – Using Layers

The Layer Panel In ArtRage 2

Imagine a stack of see-through paper that never ran out! The layers panel in ArtRage means that I can separate out parts of my drawing and use different parts of my drawing when I use the EXPORT AS IMAGE function.

You can create just one drawing but use only parts of this drawing for each image that you save.

Start a new drawing in ArtRage and choose the size paper you would like to use. See my earlier post about choosing paper size. Add just your sky to the first paper layer and then click on ADD LAYER in the layer panel to get a new piece of paper.

Add your hills or other background to this new layer and then click on ADD LAYER again. Your paint will not get mixed together because each part is on a separate layer.

Keep adding new layers as you build up your drawing. Remember to save your drawing as you go. It would not be good to lose your hard work if anything went wrong. Just use FILE, SAVE PAINTING and give it a good file name.

Why do I like layers so much?

  • It is easy to change the order of the layers by clicking on a thumbnail in the layer panel and dragging it up or down the stack.
  • If you make a big mistake you can delete just one layer and keep all the rest of your drawing safe.
  • Using the eye at the side of each layer thumbnail I can turn off (hide) parts of my drawing to export my drawing and then turn on (show) those parts again and export my drawing again.
  • I can copy a layer to repeat a design. I used this function to help me create my blog header.
  • I can resize or rotate a layer.

How would you use layers in ArtRage?

Leave a comment to help others.

ArtRage – What Size Paper Will I Use?

When you first start using ArtRage you tend to just open the program and start having fun with all the drawing and painting tools but…..

isn’t it better to think first about how you might use your creation once it is finished.

  • Do you want a banner, title or an avatar?
  • Is the drawing going on the web, being printed or added to a PowerPoint slide?
  • square or rectangular – which would be best?

ArtRage opens with a piece of ‘paper’ all ready to draw on and it will be the shape and size of your computer’s screen. This might not be what you need – or want – so to change this you will need to start a new painting by clicking on FILE – NEW PAINTING and changing some numbers.

Use the top part of the dialog box to change the size of your ‘paper’

The very important thing to remember is to click the OK button at the bottom of the dialog box when you have changed your ‘paper’ size.

ArtRage OK button

Now you are ready to go ahead and have some fun with all the lovely art tools, your unlimited supply of paint, pens, pencils, the stencils, palette knife and eraser.

Awash in the sea of Twitter

The last part of the Kick Start Your Blog has been all about building readership of your blog. Again there is lots to take in throughout the challenge post and I will be going back over it more than once while I work through some of the suggested ways of inviting readers to your blog.

Joining Twitter was one of the suggestions and so I have jumped on in. I had never explored Twitter before but was very aware of it’s existence.

Signing up was easy and I stuck with the name of my blog for my username.

Twitter Image

@MrsSOnline

Now comes the hard part. It is all new and a bit overwhelming so I am working my way through The Edublogger’s Guide to all thing Twitter. I have downloaded TweetDeck and will be finding my way about it over the next few weeks.

Another site I will be exploring was linked to from The Edublogger’s guide is called Blog Tips and there are a series of posts for me to work through.

Can you recommend any other good Twitter or TweetDeck for beginner sites?

Widgets and The Case of The Vanishing Widget

Kick Start Your Blogging has moved on to looking at widgets. Widgets? The name always makes me smile and I had to go looking for the origins of the word.

Wikipedia gave me this:

“Widget” entered American English around 1920 as a generic term for any useful device, particularly a product manufactured for sale. In computer use it has been borrowed as a shortened form of “window gadget”, and as such was first applied to user interface elements during Project Athena in 1988. The word was chosen because “all other common terms were overloaded with inappropriate connotations” and – since the project’s Intrinsics toolkit associated each widget with a window of the underlying X Window System – because of the common prefix with the word window.

from GUI Widget article on Wikipedia

Using Google’s define function gave me quite a varied list of definitions.

Widgets are on the sidebar of your blog and they give visitors to your blog lots of little bits of information. I tend to agree with those bloggers who have stated that too many widgets are not a good idea. I think that they then become a distraction from the writing in the posts. The students I am blogging with are using Kidblog and they do not have any sidebars to play with. I am still not sure if this will be good in the long run but it has been good for keeping the focus on the post writing and commenting at the start. My more capable students have already explored adding widgets within their posts using the HTML tab of the post editor.

On to my ‘sad’ tale……

I explored my widgets when I revisited my neglected blog at the start of this challenge. I changed my theme and then wandered through the various tabs on the sidebar of my admin page and found the widgets. At this stage I do not think that I had upgraded to a pro blog (I got sick of the ads so I upgraded). I was rearranging my widgets and I dragged the Categories widget out of Sidebar 1. It vanished and I now have no idea where to find the widget to put it back. I got some great advice from Miss W on where to look but as you can see in the picture it is nowhere to be seen.

I still have categories on my posts and in the admin sidebar but no category widget. I do not think it matters as I have added a search widget and tags widget and the categories still show in each individual post.

I have a pages widget because my theme did not add the pages across the top of the blog and I think I will keep my avatar widget at the top as it is the same as my comments avatar.

On my class blog last year I found it very useful to add two time widgets. One was set for our own timezone and the other was set to the timezone of our absent classmate. The grade 2-3 class were then able to look and think about what their classmate might be doing. It generated some very interesting discussions as they were able to compare times and activities. I think I got the widgets from TimeandDate.com and used a HTML box to add them to the blog’s sidebar.
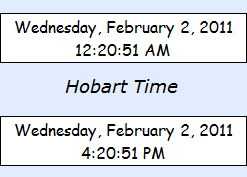
Time Widgets

The widgets on my blog will probably change over time as I explore more but they definitely add to the experience.


Exploring Poll Daddy

Poll Daddy was another site recommended in Challenge 6. I have created my first poll.


This is a site that requires you to sign up and asks in the terms and conditions that you be over 13. I teach primary students and have come across this often. I am hoping to continue blogging with some students and they will definitely want to add some media to their posts so I think I would like to compile a list of sites I would feel comfortable encouraging them to use on their own. I do not feel comfortable allowing students to sign up for sites that have an age requirement or ask for an e-mail from school. It seems to contradict discussions we have about internet safety and etiquette if I then tell them it is OK to ignore this statement and lie about their age.

What do you think?
Is is OK to ignore the age requirement of these sites?
Can you suggest good sites for primary/elementary aged students?