Apps for Both

Recently my school has been the lucky recipient of some iPad mini devices. It has been a steep learning curve as I deliberately chose to go down the Android path with my choice of personal devices.

As our school is already using many Windows desktops and laptops I was delighted when I discovered the Maths Learning Center website where they have some great free apps for iPad devices which are also available as web apps. The best of both worlds!
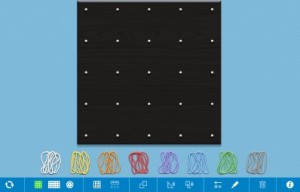
Screenshot of the web based app

The first app that we have been exploring in my ICT sessions has been the Geoboard app. It has captured the attention of most, if not all, of my students from Prep to Grade 6. Students initially used both the iPad version and the web based version to complete some open ended tasks. That was great as we definitely did not have enough iPad mini devices for everyone to use at the same time.

After using it to explore creating shapes through open ended tasks we moved on to designing quilt blocks. The open ended task cards that were in the TpT pack that I purchased were a great way to start exploring how the app worked. It would also be very useful when looking at area and perimeter.

I work with all classes within the school over two days and use a buddy system with the younger classes where 1/2 of one of the senior classes remains with a junior buddy class to help with some of the technical issues of saving and finding work. The other great benefit of the buddy system is the collaboration that occurs across grades.

We are now using the Geoboard app to create a new quilt for a very fussy Princess. I started out by telling each  class the story of The Princess and The Pea with a twist at the end. The germ for this idea came from a book called Traditional Tales with a Mathematical Twist written by Vince Wright. The students involved with collaborative creating were from our 1/2 classes and our 5 and 5/6 classes.

After hearing the story and being issued the challenge of designing a quilt for a very fussy Princess we used the Geoboard app to create an initial square design for our quilts.

Initial block created with the Geoboard app.

After finishing their design each student used the snipping tool to create a copy which was then pasted into MSPowerpoint. We were then able to use the picture tools, copy and paste and the rotate tool to create multiple blocks that were able to be joined together using the group function in the Picture Tools ribbon. The finished design could be grouped and saved as a picture.
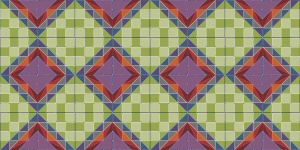
The finished design after manipulating in MSPowerpoint.

This is the first time that I have tried doing a fully digital version of the Quilt for a Princess idea. Previously I have use paper templates that we then copied and duplicated with a photocopier or scanned and manipulated for the students in MSPowerPoint using the edit background tool. It was great see all students have a go. The children were easily able to see the complexity of their design grow as they added more blocks by copying and pasting. Their designs can be seen on our shared school blog.

Some of the things we have learnt along the way are:

  • adding layers of rubberbands in the Geoboard app allowed us to create different depths of colour to our design.
  • that using the Windows snipping tool makes it very difficult to screen clip an exact square. MSPowerPoint comes the rescue in the picture tools by allowing us to remove the ‘lock aspect ratio’ tick to resize to a square and then lock the aspect ratio again. Squares tile much more easily.
  • in MSPowerPoint there is an INSERT SCREENSHOT button on the insert ribbon that could also be used to add the design from the Geoboard app. Once in MSPowerPoint it could be cropped before being resized and duplicated.
  • The group tool is a timesaving device. We could group 4 squares together and then copy and paste this. We could group rows together and then copy and paste this.
  • The view gridlines option was also helpful to line up our squares.
  • CTRL C and CTRL V got a good workout and one student found that CTRL click and drag was a great way to duplicate the initial square block.
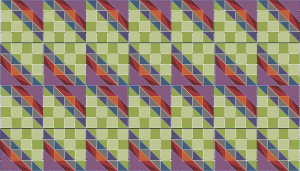
Same starter block - different design.
Same starter block – different design.

MSPowerpoint is not the only software that could be used to create the quilt design. It just happened to be the most convenient for my classes. It is also very good for showing students that an app or piece of software can have many uses depending on what you require as your end result.

Have you used the Geoboard app? How else might it support maths learning in your classroom? Please leave a comment sharing your thoughts.

Make Your Mark – International Dot Day

International Dot Day is on September 15th. It is a day that evolved from a story by Peter Reynolds called The Dot. The themes in this book encourage creativity, bravery and self expression. On Dot Day teachers and children are encouraged to “make your mark… and see where it takes you.”

I used Canva and Thinglink to create an interactive poster to use with my students when we explore Dot Day.

Have you ever celebrated Dot Day? How would you mark your mark? Please leave a comment sharing your thoughts.

Computers for Creating

Over time I have read some great articles about how we use computers in education. Today I found yet another where some of the words resonated greatly with my own thinking.

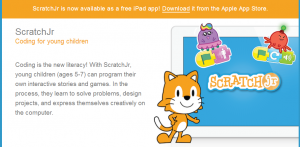
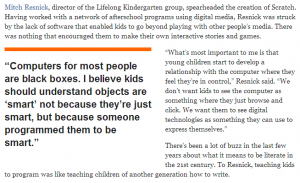
A screenshot of part of the article from http://bit.ly/1qwecfu

This article appeared on Mindshift in February 2012 and talks about the thinking behind creating a Scratch for Juniors to introduce young children to programming concepts. This one statement “We don’t want kids to see the computer as something where they just browse and click. We want them to see digital technologies as something they can use to express themselves.” is a thought that I have often voiced in discussions about computer use in classrooms.

Interestingly the new Scratch Jr app has just been launched two years later. It makes me wish I had an iPad! I am hoping there will be an Android app at some time in the future.

Screenshot of Scratch Jr. http://bit.ly/1nQVCAC

Have you had a chance to use Sratch Jr? What did you think? Leave a comment to share your thoughts.

Using the Software You Have

After exploring and using the lovely clipart created by Bev Evans on her Posterous site (which will sady disappear when Posterous closes down) I also found her great videos about using the drawing tools in MSPublisher to create your own clipart and backgrounds.

I decided to show my grade 5/6 students this video and ask them to use the techniques to make their own avatars. Yes there are lots of online avatar creators but this is a great way to get your students exploring software and creating something unique.

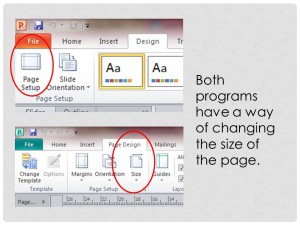
You can use either MSPublisher or MSPowerPoint to make creatures like these. The gradient fill tools work slightly differently in each of these software packages and this can give slightly different end results.

You can use the page design tab in either piece of software to change the page dimensions.

For my students I created a template with the dimensions of the page already changed to a square shape so that they could focus on exploring the drawing tools. They could choose to use either the MSPublisher template or the MSPowerPoint template as their starting point. The other reason I chose to use a template was that I could restrict the size of the initial images because if our end result is as online images we do not need anything large.

Take a look at our class blog post to see some of their work. For using as an avatar we will save them as JPEGs but we are also going to make use of them in another way by saving the same image in a different manner. When my students have finished they can group all the objects together. They can then right click on the image and choose SAVE PICTURE AS. By doing this it will be saved as a transparent PNG file.

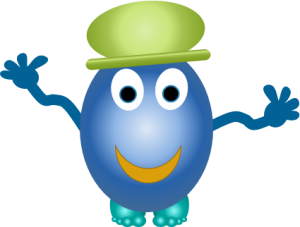
Meet Henry. My own try at following Bev’s great instructions.

A transparent PNG file could be used as a sprite in Scratch, as an animated object in a digital story or as a piece of clipart in a MSWord document. This becomes a way of showing my students that they can create unique clipart rather than using standard clipart.

During this activity we learnt about grouping objects, copying, pasting and flipping to create mirror images, layering, and editing the format of shapes via menus or via the edit points option. We became more proficient at moving from tab to tab within the software and with watching a small section of video before experimenting and then moving on.

By watching this one video we have learnt to use a commonly owned piece of software in a very different way. This is a great way to show our students that software can be adapted for many creative uses if we are willing to explore the possibilities.

How have you used MSPublisher or MSPowerPoint in a different way? Is there another piece of software you have used in a different way?